Startup Booth Ideas That Drive Leads, Not Just Likes

Startup Booth Ideas That Drive Leads, Not Just Likes
Six startup booth ideas actually move the needle: a hero product display, an interactive demo station, a photo/social wall, a gated prize or spin-to-win, a tablet quiz, and a mini workshop schedule. That’s the list. Everything else is decoration.
Here’s why these six and not the twelve other things Pinterest told you to build: each one either pulls a stranger off the aisle or captures their contact info once they’re standing in front of you. Startups typically have limited budgets and should avoid investing in spectacle that doesn’t convert, and experts who study booth traffic agree that the biggest mistake founders make is chasing visual “wow” instead of designing every element around lead capture. TradeshowLabs and BizBash both frame it the same way: crowd size means nothing without a purpose attached to it. At Coumba Win, we build booths the same way we build websites, with a single job to do, not a wish list of features.
Attendees typically decide whether to stop at your booth very quickly, often within a few seconds, which is your entire budget for making a first impression. Here’s the quick-fit guide before you commit to a footprint:
- 10x10: hero product display + tablet quiz (one focal point, one data-capture moment)
- 10x20: interactive demo station + gated spin-to-win (room to let people linger)
- 20x20 island: all six, staggered across zones (photo wall on one side, workshops scheduled on the other)
Key Takeaways
A startup booth converts when its design follows the three-second rule and every interactive element is built to capture a qualified lead, not just attention.
| Point | Details |
|---|---|
| Pick your six activations | Hero display, demo station, photo wall, gated prize, tablet quiz, and workshop schedule cover most startup needs. |
| Open layout beats a fortress | Keep the aisle-facing side barrier-free and staff positioned at the edge, not behind a table. |
| Gate engagement behind data | Ask for an email plus one qualifier before a spin, print, or quiz result. |
| Follow up within 48 hours | Segment leads by qualification tier the same day the show ends, before notes go cold. |
| Build with a coordinated partner | Coumba Win Design’s Demo Day Kit bundles booth graphics, swag, and logistics into one build instead of four vendors. |
Table of Contents
- Startup Booth Ideas Start With Design Fundamentals
- How Should You Lay Out Your Booth for Traffic Flow?
- What Should Your Booth Say in the First Three Seconds?
- Interactive Booth Ideas That Actually Pull a Crowd
- Which Lead-Capture Tech Actually Works for a Small Team?
- Staffing Your Booth: Roles and Scripts That Convert
- What Size Booth Should You Choose, and What Does It Cost?
- Materials and Rentals That Look Premium Without the Premium Price
- Build Timeline: What to Do and When
- Real Examples: What a Startup Booth Actually Delivers
- Pre-Event Marketing Strategies to Drive Booth Traffic
- Post-Show Follow-Up Tactics to Convert Leads
- Design-First but Conversion-Focused: A Note From Coumba Evelyn
- How Coumba Win Design Handles the Booth Build for You
- Sources
- FAQ
Startup Booth Ideas Start With Design Fundamentals
Before you pick a single activation, get four things right, because no game or giveaway saves a booth that fails the basics.
The one-message rule says your booth communicates exactly one idea, not three. If someone has to read a paragraph to understand what you do, you’ve already lost them to the espresso stand two aisles over. The three-second rule is the deadline: from 20 feet away, a passerby needs to know what you sell and why they should care before they’ve finished walking past your space.
Open flow beats a fortress every time. Booths with tables blocking the entrance or barriers ringing the perimeter get walked past, because nobody wants to commit to a conversation before they’ve even made eye contact. Snapbar’s research on booth engagement backs this up directly: open layouts increase natural entry and dwell time, and staff positioned at the edge of the booth (not hiding behind a counter) convert more walkers into conversations.
Vertical space is the cheapest real estate you’ll ever buy. A tall backdrop, a lit riser, or a suspended sign reads from across the hall in a way that a tabletop banner never will.
Run through this checklist before your design gets locked:
- One headline, readable from 20 feet
- No barrier between the aisle and your team
- At least one vertical element taller than eye level
- A clear focal point (product, screen, or person)
- Lighting that draws the eye to that focal point
- A defined space for a real conversation, away from foot traffic
Pro Tip: Print your booth graphics at actual size, tape them to a wall, and walk 20 feet away before you approve anything. If you can’t read your own headline from there, neither can your prospects.
How Should You Lay Out Your Booth for Traffic Flow?
Think in three zones: attraction, engagement, and conversion. The attraction zone sits right at the aisle, doing the three-second job. The engagement zone is where the interactive stuff lives, games, demos, the quiz tablet. The conversion zone is quieter, tucked toward the back, where a real conversation about pricing or a demo booking actually happens.
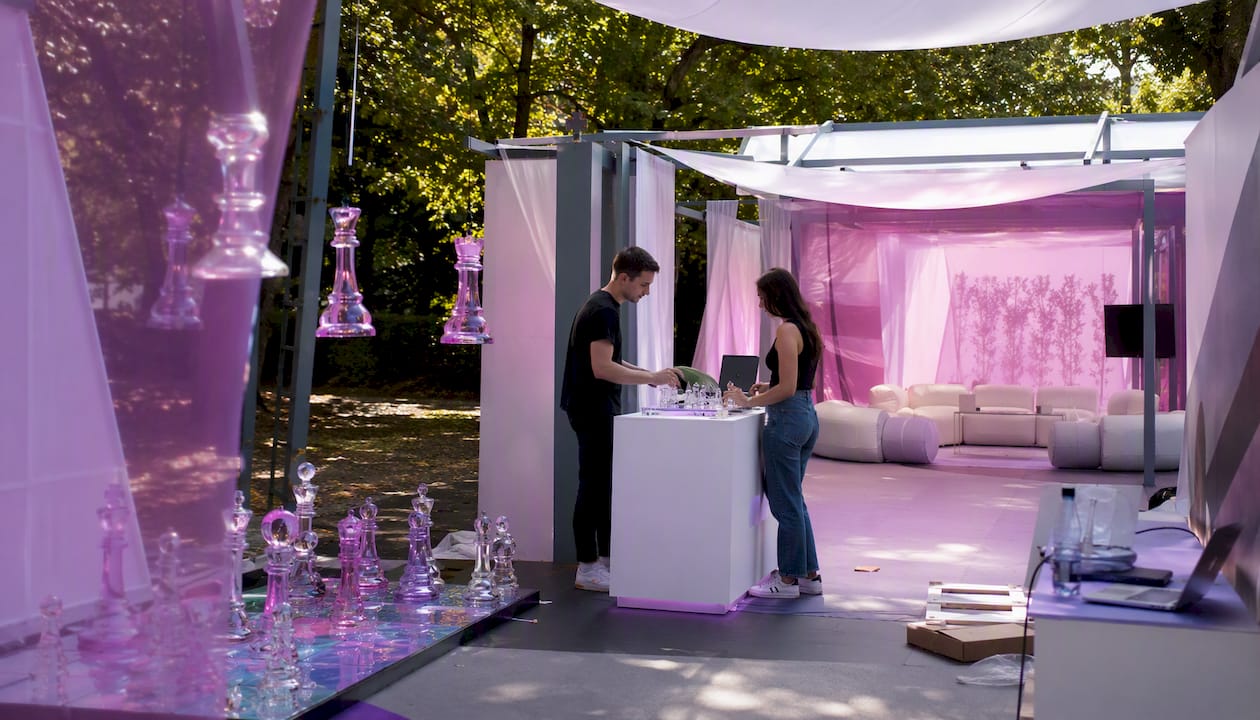
For a 10x10, this gets compact fast. Put the hero product or headline graphic at the front edge, a single demo station in the middle, and a small standing table in the back corner for the two-minute conversations that matter. One staffer can run this whole footprint if the activation is simple.
A 10x20 inline gives you room to separate the zones properly. Attraction graphic up front, an interactive station (spin-to-win or a live demo) in the middle third, and an actual seating or standing area for deeper conversations in the back third. Two to three staffers work well here, one greeting, one running the activation, one available to close.
A 20x20 island gets approached from all four sides, so you need attraction elements on every face, not just one. Center your hero display or a tall structural piece, and stagger engagement activations around the perimeter so no single side becomes a dead zone.
Quick do’s and don’ts:
- Do place your tallest element where it’s visible from the widest angle of the aisle.
- Do leave a genuinely open path into the booth, at least six feet wide.
- Don’t put your product table facing away from the aisle just because it looks tidier that way.
- Don’t cram every activation into one corner and leave the rest of the booth empty.
What Should Your Booth Say in the First Three Seconds?
Font size and contrast do more work than most founders expect. If your headline isn’t at least 3 to 4 inches tall on a standard backdrop, it’s invisible from the aisle. Pair a dark, saturated background with light, high-contrast text, or vice versa. Muted color-on-color combinations look elegant up close and disappear from 20 feet.
Three headline templates you can adapt on the spot:
- “[Value proposition] for [audience]. Meet [product name].”
- “[Product name]: [core benefit] without [common pain point].”
- “Stop [problem]. Start [outcome]. See it live at booth [number].”
Keep the eye path simple: logo top center, hero visual or product shot in the middle, call to action at eye level where a standing adult naturally looks. That’s roughly top, then center, then action, in that order every time.
What kills messaging fast:
- More than one headline competing for attention
- Body copy smaller than 24-point at booth scale
- Internal jargon your own investors would need explained
- A call to action buried under a paragraph of features
Interactive Booth Ideas That Actually Pull a Crowd
Engagement activations split roughly into three tiers, and startups rarely need to go past the middle one to see results.

Low-tech, low-cost: analog polling boards, a simple skill game (ring toss, mini basketball with your logo on it), or a punch-card style raffle. These cost little and work well in a 10x10, where space and budget are both tight. Low-tech activations remain genuinely effective for small footprints, especially when the game ties back to something about your product.
Mid-tech: a tablet-based quiz that scores visitors against your ideal customer profile, a live demo station, or a branded photo/social wall. These do double duty: they create a shareable moment and a data-capture opportunity in the same interaction.
Higher-tech: AI-generated art prints tied to your brand, AR product overlays, or a spin-to-win wheel gated behind a badge scan. TradeshowLabs highlights spin-to-win gated by badge scan as one of the more reliable 2026 tactics precisely because it forces the data exchange before the fun part happens.
Whatever tier you choose, tie the activation directly to your product where possible. Interactive elements connected to the actual product, hands-on trials, live demos, tablet assessments, consistently outperform generic entertainment in B2B settings, which means your booth game should teach someone something about what you sell, not just kill 90 seconds of their time.
The exchange rate matters too. Ask for an email plus one qualifying answer (company size, role, timeline) in return for a spin, a print, or a quiz result. That’s usually enough friction to filter out badge collectors without scaring off real prospects.
Pro Tip: Post your game rules somewhere visible and keep each interaction under 60 seconds. A line forms fast when a “quick game” turns into a five-minute ordeal, and that line kills your throughput for the rest of the hour.
Which Lead-Capture Tech Actually Works for a Small Team?
Three practical methods cover most startup needs. Badge-scan-to-CRM sync is the fastest at the point of contact but usually needs rental hardware from the show organizer. A tablet form or quiz app captures richer qualification data and works on gear you already own. QR codes routing to a short mobile assessment are the cheapest option and work well for self-serve booth traffic when your staff is tied up.
A repeatable workflow looks like this: attract someone to the booth, engage them with a demo or activation, capture their info through a scan or short form, tag and qualify them on the spot, then follow up within 48 hours while the conversation is still fresh.
Your minimum viable stack: one tablet, a lead-capture app or even a well-built Google Form, printed QR codes at every station, and a CSV export or Zapier connection into whatever CRM you’re already using. Nothing here requires custom development.
One rule that gets skipped constantly: keep every form under 60 seconds to complete, and be upfront that you’re collecting an email. Attendees notice when a “quick quiz” turns into a ten-field intake form, and goodwill evaporates fast when that happens.
Staffing Your Booth: Roles and Scripts That Convert
Staffing scales with footprint. A 10x10 runs fine with one person managing a tablet-based activation solo. A 10x20 needs two to three: someone greeting the aisle, someone running the demo, and ideally someone free to qualify and close. A 20x20 island with traffic on all sides needs four or more, plus a floater handling swag restocks and logistics so nobody leaves their post.
Assign roles explicitly: a greeter/host who invites people in, a demo operator who runs the activation, a closer who handles qualification and next steps, and a floater who keeps the booth stocked and running.
Three scripts worth memorizing:
- Aisle invitation: “Hey, got 30 seconds? We’re showing [product] live, takes less time than this conversation.”
- Demo handoff: “This is [name], they’ll walk you through exactly how this solves [problem] in about two minutes.”
- Qualifying question: “What are you currently using for [category]? …Got it. Want me to send you a two-minute walkthrough after the show?”
Track this per role: conversations started, badges scanned, demos begun, and meetings booked. If a staffer’s conversation count is high but their scan count is low, the pitch isn’t landing on the qualification step.
What Size Booth Should You Choose, and What Does It Cost?
Choose based on your goal, not your ego. If you need 15 to 20 solid conversations over two days, a 10x10 does the job. If you’re trying to book actual meetings and need room for a real demo station, go 10x20. A 20x20 island only makes sense once you’re bringing four or more staff and expecting heavy multi-directional traffic, since otherwise you’re paying for empty square footage.
Startup booths built around three principles, legible three-second messaging, one hero product, and vertical presence, can come in under $5,000 for a solid 10x10 setup, with fabric tension backdrops typically costing in the low to mid hundreds of dollars, and fitted tablecloths are available for reasonable prices
Where to save without looking cheap: rent modular frames and graphics for a one-off show rather than buying, use fabric backdrops instead of rigid panel walls (lighter to ship, cheaper to replace), and lean on battery-powered LED accent lights instead of a full lighting rig.
Materials and Rentals That Look Premium Without the Premium Price
These four items alone can carry a 10x10 or 10x20 booth.
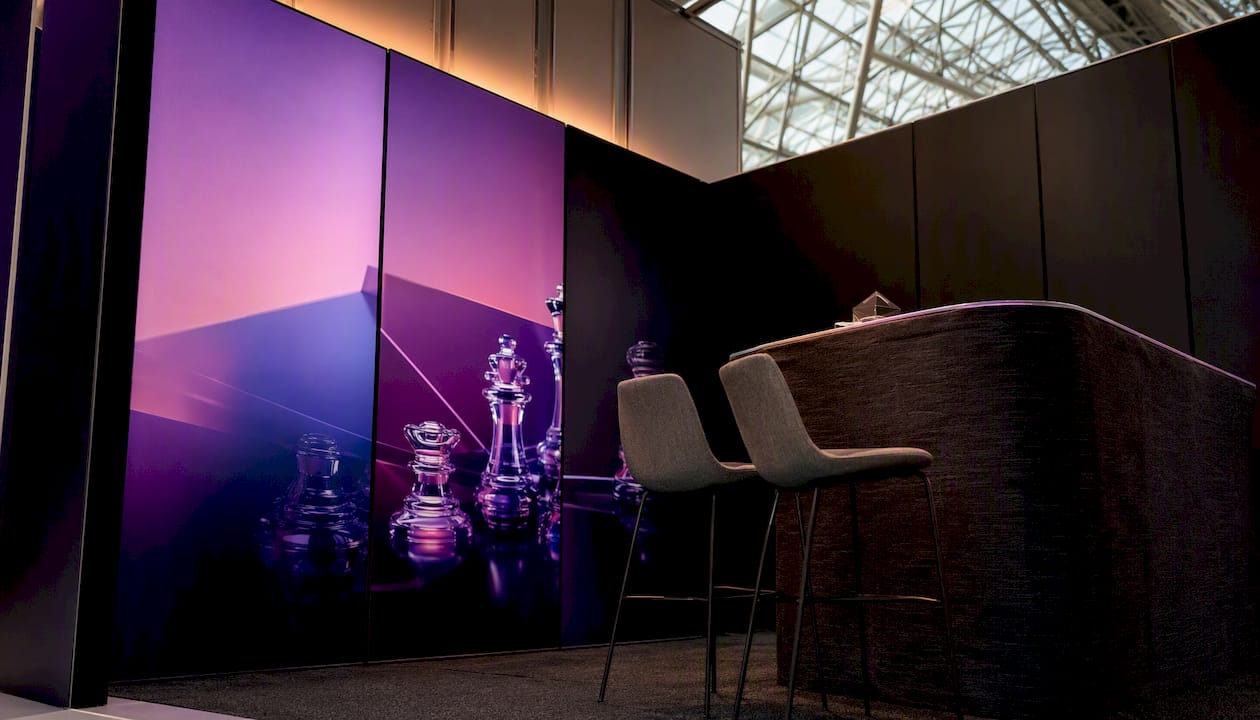
Rent your modular frame and graphics if this is a one-off show or you’re testing a new message. Fabric graphics, on the other hand, pack flat, survive multiple events, and are worth owning if you’re exhibiting more than twice a year. Planning modular, reusable systems six to twelve months ahead makes sense once you know you’ll be doing this on a repeat basis rather than a single show.
Skip heavy carpet if the venue’s concrete floor is acceptable; it saves shipping weight and setup time. Standing-height counters beat chairs almost every time, since seated visitors are harder to redirect once a conversation runs long, and standing keeps the whole booth moving.
Pro Tip: Two spotlights do more than a dozen ambient fixtures. Aim one directly at your hero product and one at your backdrop graphic; the contrast between lit and unlit space is what reads as “designed” rather than “thrown together.”
Build Timeline: What to Do and When
Work backward from show day so nothing becomes a last-minute scramble.
- 12 weeks out: finalize your booth concept, book any hired staff, and confirm your footprint with the show organizer.
- 8 to 6 weeks out: finalize graphics files, place print orders, and schedule shipping so it arrives with buffer time.
- 2 weeks out: run final content checks, brief your staff on scripts and roles, and confirm your lead-capture tech works offline if the venue Wi-Fi is unreliable.
- Show week: pack using a labeled checklist, and do a full setup rehearsal if your team has never assembled the booth before.
- On-site, day one morning: test AV and lighting, run a dry demo, brief staff on the day’s schedule, and test the lead-capture flow end to end before doors open.
Common last-minute failures worth preventing in advance: lighting that worked at the office but flickers on venue power (test it plugged into an actual extension cord beforehand), missing extension cords or gaffer tape (pack more than you think you need), and unlabeled shipping boxes that turn setup into a scavenger hunt. A small toolkit with tape, zip ties, and a spare charger has saved more booth mornings than any amount of pre-planning.
Real Examples: What a Startup Booth Actually Delivers
One early-stage SaaS company built a 10x10 around a single hero product screen and a two-minute live demo, skipping games entirely. Every conversation ended with a qualifying question and a scheduled follow-up call. The result was a stack of booked meetings that outperformed their previous year’s giveaway-heavy booth, despite a smaller footprint and lower spend.
A consumer hardware startup ran a 10x20 with a gated spin-to-win tied to an email and use-case question. Their qualified-lead rate improved because the qualifying question filtered out casual badge scanners before the sales team ever followed up.
A starter kit for a 10x10 under $5,000 typically includes: a fabric tension backdrop ($400 to $800), a fitted tablecloth ($80 to $150), two battery LED spotlights ($30 to $60 each), a tablet for lead capture (use what you own), and printed QR signage (under $50). Each piece earns its place: the backdrop handles the three-second rule, the lighting adds depth, and the tablet closes the loop on data capture.
Measure success with four numbers: badge scans, demo starts, qualified meetings booked, and follow-up conversion rate in the weeks after the show. If you’re not tracking all four, you won’t know which part of the booth to fix next year. Coumba Win Design’s founder, Coumba Evelyn, has written more on building brand identity that scales for teams heading into their first major show.
Pre-Event Marketing Strategies to Drive Booth Traffic
A great booth with no pre-show marketing is a great booth nobody plans to visit. Start four to six weeks out with a simple email sequence to your existing list, letting them know your booth number and what you’re demoing. Post a countdown on social with a specific reason to stop by, a giveaway, a first-look demo, a happy hour, rather than a generic “come see us.”
Book meetings before the show starts. Reach out to target prospects on the attendee list (most shows publish one) and offer a specific time slot at your booth, which turns a cold walk-by into a scheduled visit. A short teaser video showing your hero product or activation, shared a week out, tends to outperform static graphics for driving curiosity, and video assets built specifically for pre-show promotion are worth the modest production effort.
If your budget allows it, coordinate with the show organizer on sponsored placements, app notifications, or attendee bag inserts pointing to your booth number. None of this needs to be expensive. What it needs is a specific, concrete reason for someone to add your booth to their walking route before they’ve even landed at the venue.
Post-Show Follow-Up Tactics to Convert Leads
The 48-hour window after a show is where most leads actually die, not from lack of interest, but from delay. Sort your leads by qualification tier the same day, or the morning after, while your notes and their context are still fresh in your head.
Send a personalized note within 48 hours, referencing the specific conversation you had, not a generic “great meeting you” template. A one-line callback to what they said they needed does more for reply rates than any amount of polish in the email design. For your highest-tier leads, book a call directly in that first message rather than waiting for them to reply.
Segment your CRM by qualification level and route each tier through a different follow-up cadence: hot leads get a call within a day or two, warm leads get a short nurture sequence, and casual badge scans get added to your newsletter and nothing more aggressive. Track your show-to-close rate over the following 60 to 90 days; that’s the number that tells you whether the booth actually paid for itself.
Design-First but Conversion-Focused: A Note From Coumba Evelyn
I’ve watched too many founders spend their entire booth budget on the “wow” moment and none of it on the follow-up plan, which is backward. A booth that photographs well but captures no data is a very expensive backdrop for other people’s Instagram stories.
Startups should build for reusability and measurement over one-off spectacle, because you’re probably doing this again next quarter, and a modular system that scans leads well pays for itself twice as fast as a custom build that impresses for one weekend. Good design and good pipeline aren’t in tension. At Coumba Win Design, we’ve never seen them be.
How Coumba Win Design Handles the Booth Build for You
Coordinating a booth build yourself means juggling a print shop, a swag vendor, a freelance designer, and whoever’s building your lead-capture form, all while running your actual startup. Coumba Win Design consolidates that into one team and one timeline.
Our Demo Day Kit bundles print-ready backdrop and signage files, a recommended activation plan matched to your booth size, branded swag, and a logistics checklist so nothing gets missed between order and show day, all coordinated through a single point of contact instead of four separate vendors chasing four separate deadlines. Startups working with a design partner who understands both brand and booth mechanics tend to launch faster and with fewer last-minute fire drills, since the same team that built your pitch deck and website already knows your visual language cold. We also build with reusable component systems in mind, so your booth graphics can be refreshed for the next show instead of rebuilt from zero.
If you’re heading into a show in the next few months, book a consult with Coumba Win Design to see what a coordinated booth build looks like for your footprint and budget.
Sources
- Trade Show Booth Engagement Ideas: Games, Demos & Interactive Tactics for 2026 — Trade Show Labs
- 6 ways to turn booth traffic into brand engagement — BizBash
- Trade Show Booth Engagement Strategies & Common Questions Answered — Snapbar
- Interactive Trade Show Booth Ideas That Drive Engagement — Pure Exhibits
FAQ
What Sells Best in a Vendor Booth?
Interactive elements tied directly to the product, live demos, hands-on trials, and tablet assessments, consistently outperform generic entertainment for capturing qualified attention in B2B settings.
What Are the Most Common Booth Mistakes?
The two biggest are building a “fortress” layout that blocks the aisle and prioritizing visual spectacle over any actual lead-capture mechanism.
How Do You Attract People to Your Booth?
Pass the three-second rule with a legible headline visible from 20 feet, keep the layout open with no barrier at the entrance, and give people a specific reason to stop, a demo, a game, or a giveaway tied to something they actually want.
How Much Does a 20x20 Trade Show Booth Cost?
A premium 20x20 island build can run well past $6,000 once you add signage, lighting, demo tech, furniture, and shipping across a larger footprint, though startups can control costs by renting modular structures and reusing fabric graphics across shows.
Do I Need a Design Partner to Build a Startup Booth?
Not always, but coordinating print, swag, and lead-capture tech across separate vendors eats founder time; a packaged option like Coumba Win Design’s Demo Day Kit consolidates that into one build and one timeline.