Pass the 30 Second Test: Demo Day Booth Design for Startups

Pass the 30 Second Test: Demo Day Booth Design for Startups
Skip the pretty backdrop. The single highest-impact move in demo day booth design is a buyer-outcome headline visible from the aisle, paired with a live demo that proves it in seconds. Do that, and you turn passive walk-bys into qualified investor stops, which is the whole point. Everything else, including the Coumba Win branded swag you’re stressing about, is secondary.
TL;DR:
- A clear, attention-grabbing headline visible from fifteen feet, paired with a live demo that visually confirms the claim, significantly increases booth stops.
- Placement and simplicity are key; use one hero image, avoid clutter, and ensure the demo is visible from the aisle without inside engagement.
- Motion demonstrations and QR codes for next steps outperform static claims, with a focus on aligning demo content with the headline for maximum impact.
- Staff should have defined roles, with a 3-4 person team, a scripted greeter, and open layouts that prioritize spontaneous conversations.
- For quick turnaround, use modular rentals and a 14-day build service that integrates messaging, demo needs, staffing, and budget within a concise brief.
Table of Contents
- What Makes Demo Day Booth Design Actually Work?
- How Do You Design a Demo That Stops Foot Traffic?
- What Collateral and Lead Capture Actually Convert?
- How Should You Staff and Choreograph the Booth?
- What’s the Setup Timeline You Actually Need?
- Where Should a Startup Actually Spend Its Booth Budget?
- Coumba Win’s Booth Brief Template and a Real-World Test
- The Mistakes I See Founders Repeat Every Demo Day
- Get Your Booth Built Without the DIY Scramble
- Sources
- FAQ
What Makes Demo Day Booth Design Actually Work?
Trade show booth design should be built around one thing: the visitor’s path from aisle scan to stop decision to conversation to qualification to next step. Every visual choice you make either removes friction from that path or adds it, according to the Trade Show Booth Design Guide. Founders tend to design for the walkthrough photo instead of the aisle scan, and that’s the mistake.
Start with the headline. You get three to six words, visible from at least fifteen feet, that tell a stranger what changes for them if they stop. Not “AI-powered platform.” Try “Cut Onboarding Time in Half.” One is a category, the other is a reason to walk over. Place it above eye level or overhead if your booth structure allows it. Height buys you attention before anyone reads a single word of body copy.
Pick one hero visual, one product screenshot, one physical sample, one striking image, and build around it. Resist the urge to cram five value props onto one panel. A cluttered backdrop reads as noise from twelve feet away, no matter how good the individual pieces look up close.
Your logo goes last. It confirms who’s talking after the headline has already done the persuading, not the other way around.
- Test your headline by standing fifteen feet away and squinting. If you can’t read it in two seconds, the type is too small or too crowded.
- Light the headline and hero visual directly. Ambient hall lighting is flat and unflattering, and a $200 spotlight often does more for perceived quality than a $2,000 backdrop upgrade.
- Keep the logo smaller than the headline. Always.
A well-aimed light and one clear visual outperform several smaller, cluttered banners for startups working with limited budgets, which matters a lot when you’re paying for this out of a seed round.
How Do You Design a Demo That Stops Foot Traffic?
Static claims don’t stop feet; incorporating animated visuals can capture attention more effectively. Motion does. According to CEIR research cited in the Trade Show Booth Setup Guide, 59% of attendees say they specifically want hands-on demonstrations at booths, not another laminated one-sheet. If your booth’s most interesting thing is a paragraph of text, you’ve already lost the aisle.
The demo doesn’t need to be elaborate. A looping screen showing your actual product interface, a physical sample changing state, or a live output feed all work, as long as they’re visible without anyone having to step inside your footprint. Sightline is the rule: a passerby should understand what you do before they’re close enough to talk to your staff. That’s what earns the stop.
Placement matters more than production value. Put the demo where it’s visible from the aisle, not tucked into a back corner reserved for people who already decided to walk in. And run it offline or on a local loop wherever you can. Convention center Wi-Fi buckles under a full show floor, and a stalled loading spinner kills momentum faster than no demo at all.
- Choose one demo action, not a menu of features to click through.
- Align the demo directly with your headline, so the visual proof matches the claim overhead.
- Build a scan-to-play QR code or booking link so interested visitors have a next step even when your staff is mid-conversation.
- Test a fallback version (screenshots, a recorded loop) in case live tech fails on show day.
Interactive tech that has no next step attached is just expensive decoration, per the Trade Show Booth Design Guide. Every screen and every sample needs a QR code, a scheduling link, or a staffer ready to capture the lead right there.
Pro Tip: Record a 15 second version of your live demo on your phone the week before the event. If your booth internet dies on show morning, you play the video instead of standing there apologizing.
What Collateral and Lead Capture Actually Convert?
Skip the tri-fold brochure. Investors need three things on paper or on screen: traction, team, and the ask. That’s your one-pager, and it should be short enough to read while standing. Save the deep dive for a follow-up meeting, not the booth floor.
Digital collateral works better for anything longer than a page. Link your full deck from a QR code rather than printing it, since printed decks go straight into a bag and never get opened again.
Lead capture is where most startups lose the value of a good booth conversation. Here’s a simple workflow that actually gets used:
- Scan the badge first, before the conversation even starts, so you never rely on memory afterward.
- Add one or two qualifier fields on a tablet form (check size, sector focus, warm intro versus cold visit) so you can sort leads the same night.
- Hand off a QR code booking link for a 15-minute call instead of promising to “follow up soon,” which nobody does.
- Tag each lead immediately by type (hot, warm, nurture) so your post-show list isn’t a flat, undifferentiated pile.
- Match lead type to action: hot leads get a scheduled call within 48 hours, warm leads get a personalized email with the deck, nurture leads get added to your update list.
A booth conversation without a captured, tagged lead is a conversation you’ll forget by dinner.
How Should You Staff and Choreograph the Booth?
Small booths need fewer people than founders think, but they need clear roles. A three or four-person team covering greeter, demo operator, closer, and floater handles most demo day traffic without anyone standing around looking lost.
Open layouts consistently outperform counter-fronted setups for spontaneous conversation, and keeping roughly 60% of your aisle frontage open is a good working target, according to the Trade Show Booth Strategy Toolkit. A table across the front of your booth is a wall. Remove it.
Your greeter’s job is the first 30 seconds, and it should be scripted, loosely:
-
Hook: “Hey, want to see how we cut deployment time in half?”
-
Qualifying question: “Are you investing in this space, or just exploring?”
-
One next step: “Let me grab your badge and set you up with a 15 minute call this week.”
-
Rotate staff every 90 to 120 minutes. Tired greeters sound flat, and flat greeters don’t stop anyone.
-
When two visitors arrive at once, the greeter takes the first while the floater immediately engages the second. Nobody should ever wait unacknowledged.
-
Brief every staffer on the qualifying question before doors open. Inconsistent qualification wastes your best leads.
What’s the Setup Timeline You Actually Need?
Work backward from move-in day. Start logistics planning six to eight weeks out, since that’s the window most venues and vendors require for booth setups, per the Trade Show Booth Setup Guide.
- 8 weeks out: Finalize your booth design, headline copy, and hero visual. No more changes after this point without risking your print deadline.
- 6 weeks out: Submit electrics and internet requests to the venue. Power drops and connectivity get assigned on a first-come basis.
- 4 weeks out: Confirm your installation and dismantle (I&D) crew, and lock in drayage if you’re shipping materials rather than carrying them.
- 2 weeks out: Finalize graphics production and run staff briefings, including the greeter script and lead-capture workflow.
On-site, brief your I&D crew, AV vendor, and lighting technician in that order, since lighting placement depends on where the structure and screens actually land. Smaller pop-up builds can be ready in a matter of hours, while custom island booths often need one to three days, so budget your on-site time accordingly.
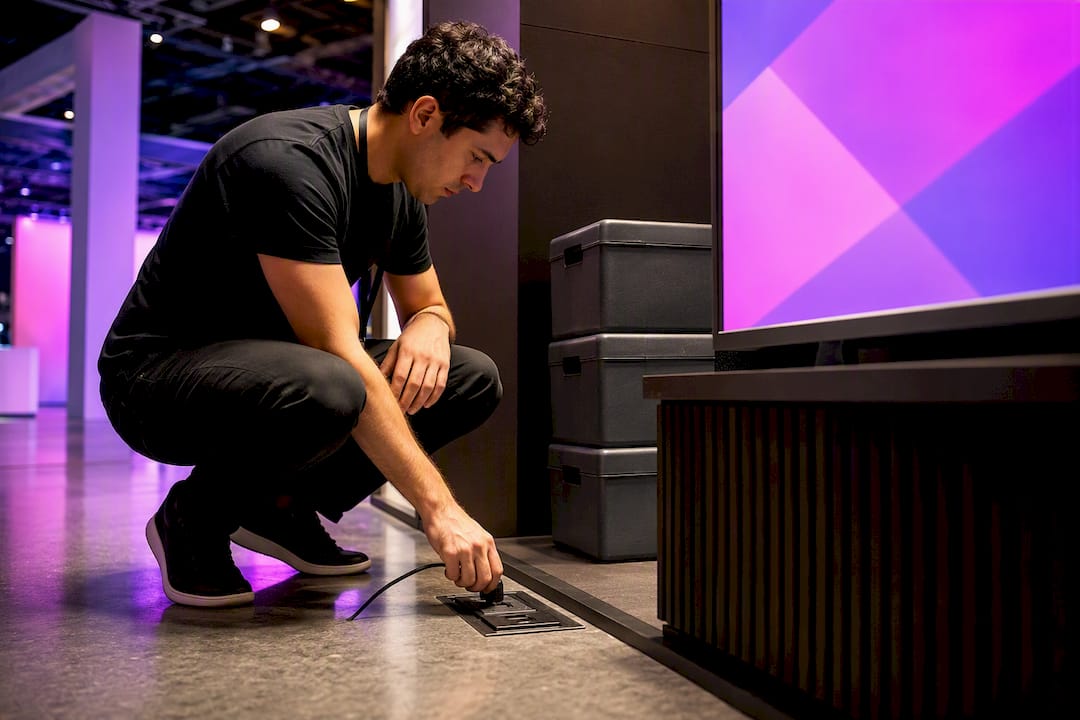
Before you walk away from setup, check your booth orientation against the venue’s master floor plan. Correcting a backward-facing booth on-site can eat hours you don’t have on opening morning, based on walkthrough guidance from ExhibitionsVoice. Also confirm your power drop location, storage for bags and swag boxes, and that every screen actually powers on before the doors open.
Where Should a Startup Actually Spend Its Booth Budget?
Rent, don’t buy, unless you’re doing more than two or three shows a year. Modular systems that get re-skinned with new graphics for each event deliver most of the visual polish at a fraction of custom build costs, which matters when your budget is measured in low thousands, not tens of thousands.
- Put your money into lighting and altitude first. A tall overhead sign plus a well-lit hero visual beats a full custom island on every metric that matters for a startup budget.
- Fund lead-capture tech (a tablet, a badge scanner) before you fund a second demo screen. One good demo with reliable capture beats two mediocre ones.
- Keep a 10 to 15% contingency for last-minute print reruns or a broken screen. Something always breaks the morning of.
For early-stage teams, modular rentals, targeted lighting, and one hero visual consistently deliver the strongest return relative to cost.
Coumba Win’s Booth Brief Template and a Real-World Test
Demo Day kits include branded swag and booth materials, designed around a short brief that keeps the whole concept operationally realistic instead of aspirational. The brief covers event context, audience, goal, primary message, demo needs, staffing plan, and budget boundary, which mirrors what serious exhibition guides recommend before a single graphic gets designed.
A brief that passes the first 30 seconds test answers two questions before anyone touches Illustrator: where do the visitor’s eyes land first, and what do they do next. If those two answers aren’t obvious, the concept isn’t ready to build.
- Event context and audience: who’s walking this aisle, and what do they already believe about your category?
- Goal and primary message: one outcome, one headline, no competing claims.
- Demo needs: what’s visible from the aisle versus what’s reserved for a seated conversation.
- Staffing and budget boundary: how many people, how many hours, and what the concept costs to actually build within that.
The Mistakes I See Founders Repeat Every Demo Day
Three mistakes show up over and over: leading with the logo instead of the outcome, blocking the entry with a table or counter, and hiding the demo behind the staff instead of the aisle. Each one is fixable in an afternoon, but founders rarely catch it themselves because they’re standing inside the booth, not walking past it.
Before opening morning, walk the aisle yourself, approach your own booth as a stranger would, and time how long it takes to understand what you do. If it’s more than five seconds, fix the headline before you fix anything else. Rehearse your staff’s first 30 seconds the same way you’d rehearse a pitch, because that’s exactly what it is.
— Coumba Evelyn
Get Your Booth Built Without the DIY Scramble
Building all of this yourself, headline copy, hero visual, demo screens, one-pagers, lead-capture setup, in the weeks before a demo day is exactly the kind of scramble that produces a logo-first booth nobody stops for. The Demo Day Kit delivers pitch decks, booth materials, and branded swag on a 14-day timeline, built directly against the same brief structure covered above: message, demo needs, staffing, and budget boundary.
Instead of guessing at layout and hoping your headline reads from the aisle, you get a concept designed to pass that first 30 seconds test before it ever gets printed. It maps straight to what you need on show day: an overhead message that reads from a distance, a demo visual built around your actual product, and lead-capture materials that don’t feel like an afterthought. If your event is inside two months, that turnaround is the difference between a booth you’re proud of and one you built at 2 a.m. the night before.
Check availability for your event date on the Demo Day Kit page, or browse Coumba Win Design’s broader design services if you need branding work beyond the booth itself.
Sources
The Trade Show Booth Design Guide covers the visitor-path framework behind this article’s structure. The Trade Show Booth Strategy Toolkit breaks down open-layout data and pre-show promotion tactics. The Trade Show Booth Setup Guide details setup timelines and demo engagement stats, and the budgeting guide for startups covers cost-smart booth spending.
- Trade Show Booth Design Guide 2026 | ExhibitionsVoice Blog
- The Trade Show Booth Strategy Toolkit - Samaaro
- Trade Show Booth Setup Guide | Adam Expo Stand
- Trade Show Budgeting for Startups: Maximize ROI with Smart Cost-Optimization
FAQ
What Size Should My Booth Headline Be?
Large enough to read from at least fifteen feet away, typically several inches tall depending on your booth height, with no more than six words so it registers in a two-second glance.
How Many Staff Do I Need for a Small Demo Day Booth?
Three to four people covering greeter, demo operator, closer, and floater roles handles most small booth traffic without leaving visitors unattended during peak flow.
Do I Need a Live Product Demo, or Is a Screenshot Enough?
A visible, motion-led demo performs better than static screenshots, since 59% of attendees specifically say they want hands-on demonstrations at booths, according to CEIR research.
How Far in Advance Should I Start Booth Logistics?
Begin six to eight weeks before move-in: finalize design at eight weeks, submit electrics and internet by six weeks, and confirm your installation crew by four weeks out.
Can Coumba Win Design Build My Booth Materials Quickly?
Yes. The Demo Day Kit delivers pitch decks, booth materials, and branded swag on a 14-day timeline built around your specific event brief.